All posts by jpb-admin

Qwerty keyboard as Kyma Tool controller

Tools help us carry out particular tasks and functions. Hammers drive in nails. Saws cut wood. In the digital realm, we also use tools. Faders control volume, buttons trigger sounds. However, in software, things are not always so clear cut. Faders don’t have to control volume, and buttons don’t have to trigger sounds. The examples of faders and buttons acknowledge the two types of fundamental control: continuous (faders) and discrete (button). Our digital tools are built upon these two paradigms of continuous and discrete control.

In Kyma, the Virtual Control Surface (VCS) lets us control sounds in real time. The VCS is  a tool that displays virtual faders and buttons (controlled by using a computer mouse or app). Since I don’t own an iPad, I am unable to take advantage of the VCS Kyma Control iPad app. I desired a non-mouse control inside Kyma that would let me get away from mousing and clicking. Thus, I wanted to take advantage of the controller most available to me and other users. The discrete control of the Qwerty keyboard.

Figure 1. Virtual Control Surface (VCS) inside Kyma.

This blog post covers my foray into Kyma Tools (a largely untapped resource of Kyma) and the result: an open source qwerty keyboard controller built in and for Kyma. One is process and the other is product.

Why Kyma Tool?
But let’s start off with the why. I could have easily created a Max patch that accepts ‘key’ control and then port off my ASCII values as Open Sound Control (OSC) messages to Kyma. Actually, I did. See Figure 1.

Figure 2. Qwerty control in Max/MSP sent as OSC message.

Yet, this is not as simple as it sounds. Not only do I have to open Max/MSP in order to run this patch, but I have to get the IP address of the Paca(rana), copy the IP address here… each and every time I start the Paca(rana). Not very fast for performance setup.

I wanted to see if I could embed this type of discrete, keyboard control inside of Kyma itself, cutting out third party software and reducing setup time. Hence, my foray into the Kyma Tool (aka. state machine that can read and write EventValues)

Kyma Tool Process
The Kyma Tool is where one can write a patch to carry out multi-step processes (Spectral Analysis Tool), process batch files or a folder of files, create a controller (my keypad tool), or create a virtual interactive environment (think CataRT if you wrote this in Kyma). The Kyma Tool does use SmallTalk and offers a bit different coding experience, but the Tool environment is a pretty powerful editor. I knew that if I wanted to get access to the qwerty keyboard and create a controller, I would need to dive into the Kyma Tool. (For further reference to the Kyma Tool, please see the Kyma X Manual, pp. 309-333).

Figure 3. Keypad.pci backend tool layout

Like javascript or php, there are global and local variables, and like Flash, there are event based actions, or rather “triggers” and “responses”. A huge thank you to Carla Scaletti for tipping me to the global variable LastCharacterTyped, where the initial value, $a, stores the last character value of the qwerty keyboard based upon user input. For example, typing ‘f’ becomes $f, or typing a ‘1’ becomes $1. LastCharacterTyped gets you access to the user typing on the keyboard, but only the character value of the user’s action.

The first step of my Keypad Tool is to convert each character into ASCII. Since each value is a character, I convert the character into an ASCII integer using the Capytalk “asInteger”.

keyboard := LastCharacterTyped asInteger.

The Capytalk above stores the ASCII integer into the local variable keyboard. The local variable ‘keyboard’ writes/outputs its value to the HotValue !KeyBoard. Writing the control to a HotValue provides access. !KeyBoard, the ASCII integer of a user’s keyboard, is now accessible, in real time, by any Kyma Sound that references the variable !KeyBoard. So long as one uses the Keypad Tool, !KeyBoard can be used by any Kyma Sound at any time, anywhere, just like the Max patch above.

Figure 4. keyboard variable as !KeyBoard HotValue.

The next function I desired, beyond accessing the Qwerty keyboard values as a Kyma HotValue, was to specifically address the number pad 0-9 (in ASCII, 0-9 equal 48-57). For these ten keys, I wanted 0-9 keypad values to store as their actual numbers inside a different HotValue. Below is the Kyma Tool code.

(keyboard between: 48 and: 57)
ifTrue: [keypadNumber := keyboard-48]
ifFalse: [keypadNumber := -1].

Here’s the English version. If the ‘keyboard’ variable (this is our ASCII value) is between 48 and 57 (inclusive so would react to 0-9 on the keyboard), then store your value into variable ‘keypadNumber’. If not, store a -1. In Kyma, we usually write Capytalk true: () false: ().  In Kyma Tool land, I had to learn that we need ifTrue: [] ifFalse: []. Subtle syntax, but one that I lost an hour over. You’ll see in the example files how we’ll utilize the Capytalk true: () false: () in a SoundToGlobalController.

The ‘keypadNumber’ variable also outputs its value to a HotValue, !KeyPad. !KeyPad outputs 0-9 when qwerty keys 0-9 are pressed. Otherwise, any other key value outputs -1.

Kyma Tool in Action
Ok. So how does one use this Kyma Tool?  Similar to the Tools > Fake Keyboard or Tools > Spectral Analysis tool inside Kyma, all one needs to do is open the Tool (‘keypad.pci’) inside Kyma (File > Open) and start typing on the keyboard to output values. No external software or OSC setup necessary. Of course, however, you’ll need to download the tool.

Figure 5. Two states of keypad Tool. Shows lastCharacter, ASCII value (!KeyBoard), and !KeyPad hot value.

The only note about Kyma Tools is that their window needs to be highlighted (in front) in order to work properly. This is not a new software concept, but one that users of Kyma Tools should be aware of.

Download
Download the keypad.pci Kyma Tool and example files to help you get started.
 

Sample Selection in XY Space

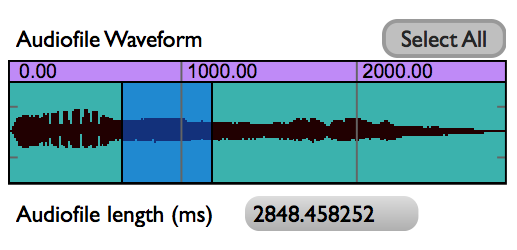
Selecting a portion of an audio sample is something that we do often. Digital Audio Workstations (DAWs) like Logic and ProTools or even Sample Track Editors like Peak and Audacity allow users to select a portion of audio.

Figure 1. Selection of Audio in Audacity.

The process of selecting audio with a mouse for out-of-real-time control (and in the comfort of one’s studio) isn’t a bad paradigm. However, what about live performance contexts? What other paradigms exist, may be altered, or can be created to benefit live performance?

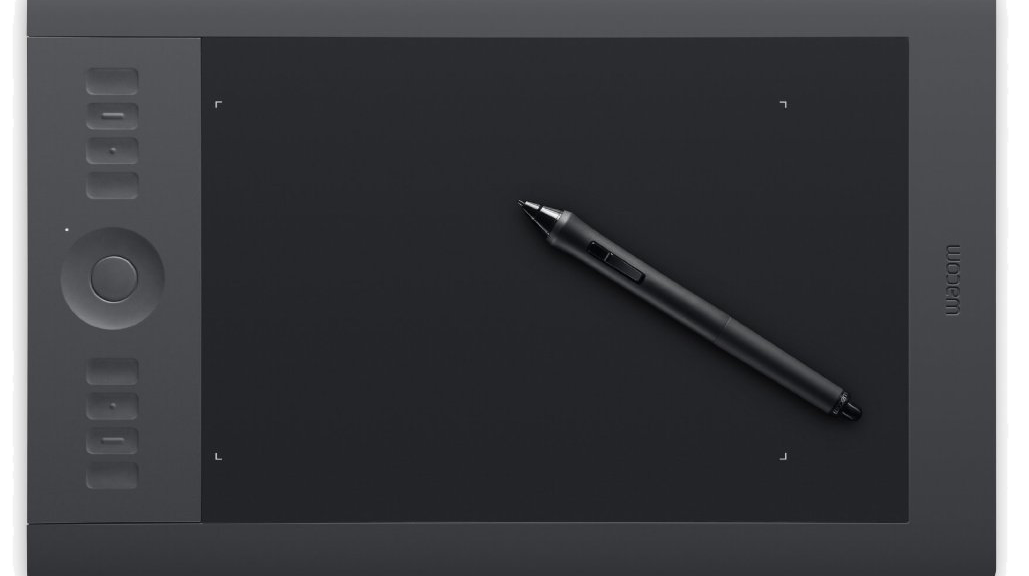
In conversations with Ted Coffey one such idea came up. With the Wacom tablet, one may alter the start and end selection times of an audio sample based upon the pen’s position in XY space. This idea, sample selection times in XY space, is entirely Ted’s and I can take no credit. Still, I was and am excited about his control idea and I really wanted to listen to a sound using the XY control paradigm. This blog post documents my implementation of sample selection times in XY space based upon Ted’s description.

The What

In order to control sample selection times we need to control three things:
a. sample selection start
b. sample selection end
c. start/stop sample

Figure 2. Sketch of sample selection control on the XY axis

Using the Wacom tablet, we map XY space onto  the sample selection start and end times (Y-axis is selection start, X-axis is selection end) and use !PenDown to trigger the sample start/release.

So, what does this sound like? Here are two examples.
The first example uses to pen to scrub different locations of the tablet. Source material is the opening theme to Beverly Hills Cop.

The second example uses grid quantization for the Pen location. Dividing the sample start location and end location times by a beat factor (e.g. 32), we can quantize the length of the selection by a fraction of a beat. Match the playback of this fraction to the !BPM of a drumbeat, and voila! Instant gratification. Source material: Beverly Hills Cop theme + Bob James “Take Me To The Mardi Gras”

To sum up, using XY space to dynamically alter start/end selection times of a sample has strong performance possibilities. For those interested, I’ve shot a quick video of the controls inside Kyma and placed my source Kyma 7 files here.

Quick Kyma notes to no-one but myself:
a. use SampleWithTimeIndex.
b. for Beat quantization,

  • Duration must be ‘audioFileNameOfDrum’ sampleFileDuration s.
  • Rate must be !Rate * (!BPM / (‘audioFileNameOfDrum’ closestBPMTo: !BPM forBeats: 64))
  • Start, End, etc. must use this syntax… ((!PenY * 64.0) rounded / 64.0)

c. for On-the-beat triggers, use Capytalk

((1 bpm: !BPM) hasChangedReset: 0) trackAndHold: !PenDown

This means that the value starts at 0, PenDown will trigger 1 when next beat occurs.

Wacom tablet: data zooming function

Over the last few months, I’ve been interested in data zooming, where a finite range of data (say 0-1) can be magnified and explored in greater detail. We are all familiar with the paradigm. In Microsoft Word or Photoshop, for example, you zoom the view (e.g. 125%) and in the same amount of screen real estate, you see a smaller region (of words or pixels) in greater detail.

dream-caused-by-the-flight-of-a-bee copy
Figure 1. Zoom in of a portion of Salvador Dali’s Dream Caused by the Flight of a Bee Around a Pomegranate a Second Before Awakening painting reveals more detail in same amount of screen real estate.

Zooming is also true for any stream of numbers. In software we can map a fader to move between 0-1 and on a similar fader (or the same fader), map the range to 0.0-0.1 (1/10 of its original range).

Max/MSP fader ranges
Figure 2. Max/MSP fader mapped to different scaling factors.

While a simple concept, data zooming can be a powerful tool. Magnification embodies focus, detail, and exploration. If sound is data or controlled by data, then magnification enables us to literally ‘zoom in’ on audio. Data zooming, then, becomes a way to explore sound space.

Inspired by Palle Dahlstedt [1], I set out to rapid prototype a way to zoom in on a data stream for live performance. I chose the Wacom tablet since I use this often in live performance with Kyma. I was most fascinated with !PenX (0-1 range), which I often map to the TimeIndex of a sound (0@start of sound, 1@end of sound). Regardless of audio sample length, PenX can be set so 0 will always be the beginning of the sample and 1 will always be the end of the sample. (note: TimeIndex range expects -1 to 1, but PenX range can be easily shifted to fit)

wacom
Figure 3. Wacom tablet.

The basic gist of data zooming is that we need two controllers to do the job: a continuous fader (e.g. !PenX) and a button to trigger the zoom (e.g. !PenButton2). The pen/fader equates to the values that we read and in our case, the values that we map onto the TimeIndex of an audio sample.

Data zoom works like this: whenever the zoom button is depressed, we take the current location of the fader and “zoom” in to the location. With zoom enacted, the fader moves at a smaller scale around this location point. The magnitude of zoom can be altered, but for the purposes of this example, I worked with a 10x zoom magnitude. Before jumping into Capytalk and Kyma, let’s walk through my initial prototype inside Max/MSP. The math is the same.

The range of initial values (!PenX) are between 0-1. When the zoom button is depressed, we need to save the current location of !PenX and use as our new zoom location (offset). In addition, we need to alter the range in which !PenX moves through data (scale). I’ve uploaded the Max prototype patch and Kyma file here.

max zoom prototype
Figure 4. Max/MSP patch prototyping data zooming function.

In order to take into account the centering of the Pen at the current zoom level, I had to add an additional offset that shifts the offset to the actual point of the pen on the tablet. The Max prototype includes multiple zoom levels at powers of 10.

With Kyma, I used the same basic concept. When a button is pressed (!PenButton2), we zoom to the current value of X (sampleAndHold) and magnify the boundaries of !PenX from 0-1 to the zoom order (exponent of 10). Because 10^0 = 1, we can use a button’s press (binary 0 and 1) to create a simple on/off zoom in Kyma.

kyma data zoom
Figure 5. Simple zoom for data values using the !PenX and !PenButton2.

Here’s the Capytalk that achieves data zooming:

(!PenX / (10 ** !PenButton2)) + ((((!PenButton2) sampleAndHold: !PenX) – (((!PenButton2) sampleAndHold: !PenX) / (10 ** !PenButton2))) * !PenButton2)

First, !PenX is scaled down when !PenButton2 is depressed (power of 10). We then add back (offset) PenX’s location from when PenButton2 was pressed. In order to take account of the actual pen location on the tablet, we have to subtract PenX’s sampled location at the same order of the zoom. Lastly, we multiply this offset by !PenButton2 so that when the button becomes 0 (zoom off), the zoom offset no longer effects PenX’s initial, non-zoom state. Thus, with PenButton2 off, the Capytalk is just (!PenX / 1) + 0. Below is a short video sounding the process.

Download the Kyma and Max files.

[1] Palle Dahlstedt. “Dynamic Mapping Strategies for Expressive Synthesis Performance and Improvisation.” in Computer Music Modeling and Retrieval. Genesis of Meaning in Sound and Music. 5th International Symposium, CMMR 2008 Copenhagen, Denmark, May 19-23, 2008.